Embarking on multi-day outdoor climbing excursions is a significant milestone for climbers worldwide. Seeking independence, many climbers, myself included, opt for van travel to reach remote crags. The allure of self-sufficiency leads to considerations like having electricity on the go, prompting thoughts of harnessing solar power. In my case, I took the leap, installing a solar module on my van to power essentials like a portable fridge and laptop, all while aiming to counteract the carbon footprint tied to these climbing adventures. Let’s look into the details of such an installation and whether it is feasible for you!
This article is structured as followed:
Introduction to Solar Cells
Solar cell research and development has been a thriving field since the 1950s starting with silicon-based modules with an efficiency of ~6% in 1954.1 Within 30 years, due to intensive efforts, their efficiency reached ~25%, while also other technologies, such as copper indium gallium disulfide (CIGS) solar cells appeared allowing for thinner solar panels. By 2010, new materials and structures, such as organic and perovskites solar cells emerged, and the research focus started to include both efficiency and longevity, making solar energy an increasingly viable option for large-scale power generation. Today, solar cell research continues to expand, with a focus on further increasing efficiency, reducing costs, and improving sustainability with record lab efficiencies in the range of ~47% for multi-junction cells.2
If you are interested in the most actual efficiency records for various solar cell technologies, visit the official NREL site for more details.2 You can find the record values from January 2024 in the figure below.

All these efficiency values are measured in a standardised setup at a fixed temperature (25 °C), irradiance spectrum (AM1.5G), angle (0°) and intensity (1000 W/m2).3 These conditions are typical for countries such as Germany, can though highly differ for other regions: Average temperatures over 45 °C in the summer in deserts are not unusual, while the hottest ever measured temperatures can be even above 80 °C.4 In contrast, increasing the temperature by 1 °C, decreases the solar module efficiency by about 0.4 %.5 Furthermore, irradiance angle and intensity also alters module efficiency. Hence, don’t be surprised if your solar module does not give you exactly the desired efficiency value.
Essential Components for Your Own Solar Module Setup
First of all, for such a setup, you will obviously need a solar module. There is a wide variety of available options on the market, being mostly in the ~20 % efficiency range. I decided to go for a module which is light, semi-flexible, and most importantly fits on the roof of my VW T5.2. This particular module provides a max. direct current (DC) of 6 A at a voltage of about 20V, yielding a power of 120 W under optimum conditions.
Having a solar module on its own will be, however, not enough to utilize its energy: A maximum power point tracker (MPPT) is necessary to extract maximum power by varying the electrical load. This way energy generation is adapted to changing environmental conditions. Furthermore, since the generated energy mostly cannot be used immediately, it needs to be stored in e.g. a car battery, until it is needed again by some kind of a load (such as lamps, fridge, laptops). While choosing the right battery, take care, that it has both a high capacity and it fits into your car. Finally, you will need some additional materials to mount and connect your components.

Installation
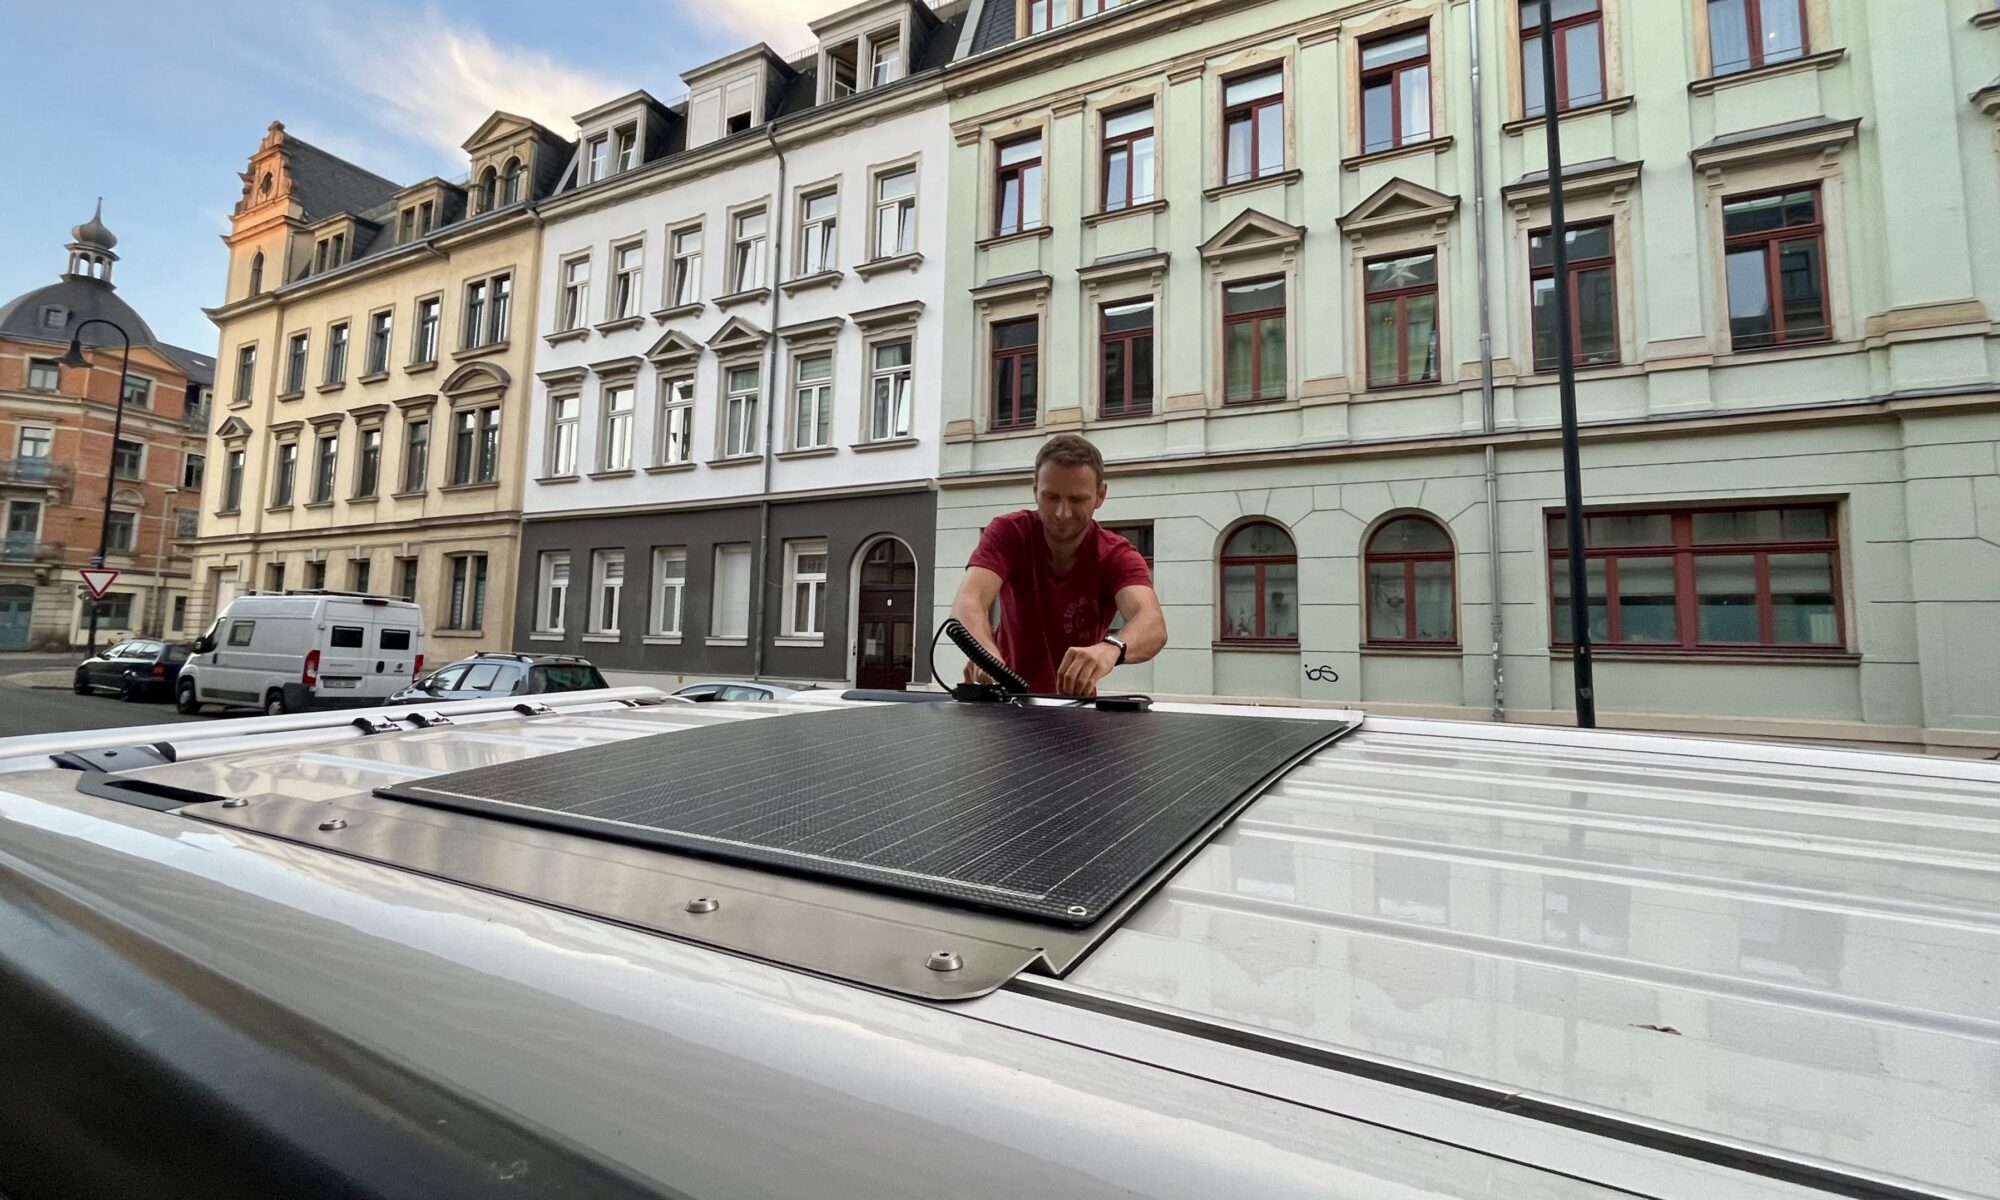
First, you need to figure out, how to mount your solar module on your van. Many vans have a roof rail system for attachments; if not, you may need to mount directly. For vans with a rail system, you can purchase a fitting aluminium plate, attach the solar module, and screw the plate to the rail system.
Next, you need to find a way to route cables from the roof to connect to the MPPT, which is usually mounted under the driver’s seat.
- In case you have a standard roof, use MC4 connectors to connect solar cables directly to your solar module. Next, cut a small hole in the protective rubber (through which the rear lights of the car are routed) and thread the solar cable through it. Make sure you seal the hole with a weather-resistant glue. Finally, route the cables inside the car to the front seat.
- For vans with an openable roof, use a flexible setup. A compatible spiral cable and an IP68 connector box can be employed. Connect the solar module through the IP68 box to the spiral cable, then proceed as in the previous step: connect the spiral cable to a standard solar cable and route them into the car up to the front seat.
Finally, mount the MPPT and connect it to both the solar module and the car battery. Enjoy the benefits of your solar-powered setup!
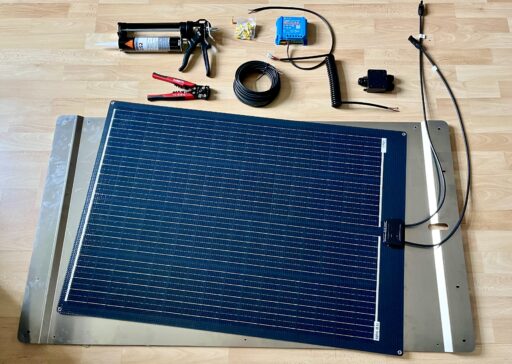
Components Overview
Feasibility Calculator: Power Generation vs. Consumption
Determining the necessity of a solar installation hinges on your energy needs and trip duration. In any case, you will need a second car battery, which may be already sufficient for you. Let’s explore that further with the calculation below.
Adjust the example values of the car battery and solar module in the power capacity section. Then, fine-tune the loads you have or plan for your van. At the bottom, discover how long until your van’s lights go out or, in simpler terms, until your battery is depleted.
In my example calculation, you’ll notice that with my limited loads, my battery alone lasts just over 2 days. However, the solar panel extends this to almost two weeks. Since I often go on trips longer than two days, such as to Fontainebleau, the solar panel installation ensures I can keep the lights on.
Understanding Battery Charging Dynamics
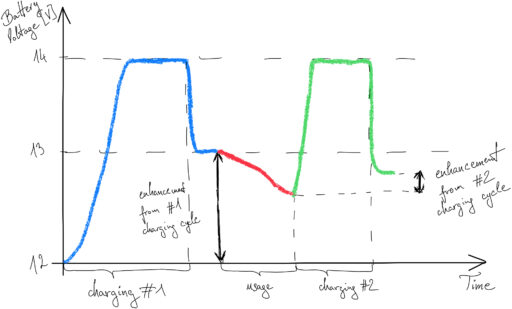
The installed system operates effectively only when the sun is shining. During sunlight, the generated current charges the battery, boosting its voltage as depicted in Figure 3. I’ve illustrated the battery voltage changes during two charging cycles with intermittent battery usage.

The voltage values provided are typical for a standard lead-acid battery.6,7 Therefore, assessing your battery charge level is straightforward – a voltage slightly above 14 V indicates a fully charged battery, while just below 12 V suggests depletion. However, it’s important to note that these values may vary slightly depending on the specific type of battery, temperature conditions, and other factors.
Outlook about Sustainability
Integrating a gasoline-fueled van into the conscious climbing lifestyle requires thoughtful consideration and a commitment to mitigating environmental impact. To keep climbing outdoors sustainable, consider the following conscious choices:
- Opt for fuel efficiency by driving mindfully and embracing a minimalist design to reduce weight and fuel consumption. Explore alternative fuels or hybrid technologies.
- Protect nature by using biodegradable soap for outdoor showers, leaving no trash behind, and minimizing single-use plastics.
- Support local economies by choosing locally sourced products to reduce the environmental impact of transportation.
- Offset carbon emissions by actively engaging in carbon offsetting initiatives.
- Use only as much energy as needed and generate it through eco-friendly renewables, such as a solar module.
These practices align with a conscious climbing lifestyle, ensuring your adventures are not only environmentally friendly but also contribute positively to the climbing community. To further enhance your climbing experience, check out our articles on Exposure to Chalk in Climbing Gyms, and Mental Training for Climbing Better. Lastly, enjoy your journeys in your solar-equipped van, and feel free to reach out with any questions or thoughts. Safe travels and happy adventuring!
Bibliography
- Fraas, Lewis, and Larry Partain, eds. Solar Cells and Their Applications. 1st ed. Wiley, 2010. https://doi.org/10.1002/9780470636886.
- ‘Best Research-Cell Efficiency Chart’. Accessed 20 December 2023. https://www.nrel.gov/pv/cell-efficiency.html.
- Photovoltaikanlagen: normgerecht errichten, betreiben, herstellen und konstruieren ; Erläuterungen zu den Normen der Reihe VDE 0126, DIN EN 50380, DIN EN 50438 (VDE 0435-901), DIN CLC/TS 50539-12 (VDE V 0675-39-12), DIN EN 60904-8, DIN EN 61194, DIN EN 61345, DIN EN 61427, DIN EN 61683, DIN EN 61829, DIN EN 62124 und unter Berücksichtigung der VDE-Anwendungsregel VDE AR-N 4105. Berlin ; Offenbach: VDE Verlag GmbH, 2011.
- Stone, Richard. “Move over, Death Valley: These Are the Two Hottest Spots on Earth.” Science, May 19, 2021. https://doi.org/10.1126/science.abj5470.
- Mavromatakis, F., E. Kavoussanaki, F. Vignola, and Y. Franghiadakis. “Measuring and Estimating the Temperature of Photovoltaic Modules.” Solar Energy 110 (December 2014): 656–66. https://doi.org/10.1016/j.solener.2014.10.009.
- Perez, Richard. ‘Lead-Acid Battery State of Charge vs. Voltage’, 1993.
- Kollmeyer, Phillip J., and Thomas M. Jahns. ‘Aging and Performance Comparison of Absorbed Glass Matte, Enhanced Flooded, PbC, NiZn, and LiFePO4 12V Start Stop Vehicle Batteries’. Journal of Power Sources 441 (30 November 2019): 227139. https://doi.org/10.1016/j.jpowsour.2019.227139.

My name is Vincent and I want to share my climbing & general outdoor experience with you. If you have any comments or questions do not hesitate to contact me!

